MAKER & CRAFT GUIDE
Is your image sharp enough for sublimation?
A “300 DPI” label is not proof of a sharp print. Check the pixels your artwork actually contains at the size you plan to put on the blank.
The quick check
Divide the artwork’s pixel width by its print width in inches, then do the same for height. Compare both results with your supplier’s target. Use 300 PPI as a planning target when no different requirement is given—but also inspect the original for blur, compression, and soft lettering.
1. Start with the actual print area
Measure the area your design must cover, not just the product’s capacity or marketing name. A “20 oz” tumbler label does not tell you the wrap width or usable height. Confirm the blank supplier’s template and leave out rims, handles, or unprintable sections.
For a straight-sided tumbler, use the straight tumbler wrap calculator. If the top and bottom diameters differ, use a tapered template instead of stretching a rectangle. Include any supplier-required overlap or bleed when checking the full exported artwork.
2. Calculate effective PPI—not the label
Imagine your measured design area is 9 × 8 inches. These are example dimensions, not a universal tumbler template. Your file contains 2,700 × 2,400 pixels, with matching proportions and no crop.
Width: 2,700 ÷ 9 = 300 PPIHeight: 2,400 ÷ 8 = 300 PPI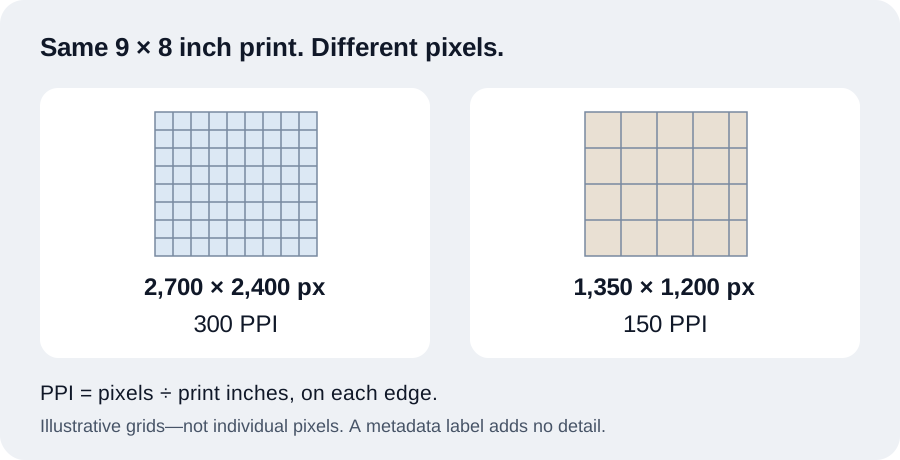
A 1,350 × 1,200 pixel file at the same size gives 150 PPI, even if its embedded metadata says 300 DPI. Changing that label with a DPI changer does not add image detail.
For a mismatched aspect ratio, check the pixels remaining after the crop. Do not divide the uncropped file dimensions by a print size that requires cutting part of it away. Use the image cropper to match proportions, then check the exported copy.
3. Work backward from the desired size
Multiply inches by your target PPI to find required pixels. For centimeters, divide by 2.54 to get inches first. Round fractional pixel requirements up.
Required pixels = print inches × target PPI| Full artwork area | Required pixels | Calculation |
|---|---|---|
| 3 × 3 in | 900 × 900 px | 3 × 300 on each edge |
| 8 × 4 in | 2,400 × 1,200 px | 8 × 300; 4 × 300 |
| 9 × 8 in | 2,700 × 2,400 px | 9 × 300; 8 × 300 |
| 10 × 8 in | 3,000 × 2,400 px | 10 × 300; 8 × 300 |
For other sizes or targets, use the pixels-to-print-size calculator or the common print-size chart.
Around 300 PPI is a common starting point for detailed inkjet prints, as explained in Adobe’s image-sizing tutorial. It is not a universal sublimation specification or a guarantee: follow your blank and print-system supplier’s requirements.
What if the image falls short?
- Find the original. A downloaded preview, screenshot, or messaging-app copy may be smaller or more compressed than the source.
- Reduce the artwork’s physical size. A 1,350 × 1,200 pixel file supports 4.5 × 4 inches at 300 PPI. This helps only if that smaller design suits the blank.
- Rebuild text and line art. Where possible, keep lettering and shapes as vector objects in your design software; check any placed raster photos separately.
- Treat enlargement as a compromise. Resizing estimates additional pixels. Meeting an export-dimension requirement does not prove that the original detail has improved.
Inspect at 100% zoom for blocks, halos, and soft text, then make a physical test. A large file can still contain an out-of-focus photo or an enlarged low-resolution image. PixGauge checks dimensions; it cannot certify focus, color accuracy, coating quality, or press results.
Before using transfer paper
- Confirm the blank’s actual dimensions and supplier requirements.
- Match the final crop to the design area without stretching.
- Check width and height PPI using the final exported pixels.
- Inspect small lettering and the source’s visible sharpness.
- Print a plain-paper fit test at actual size; disable “fit to page” and measure the output.
- Confirm mirroring, color settings, transfer paper, and press instructions with your supplier. Those steps are separate from this resolution check.
Keep the original artwork and export a working copy. If a result is soft despite adequate pixels, investigate the source image and print/transfer process rather than repeatedly changing the DPI label.
PUT THE MATH TO WORK
Check the file you actually plan to print
Compare your artwork with the full physical print area using the free sublimation checker. Image processing happens in your browser; the file is not uploaded to PixGauge.